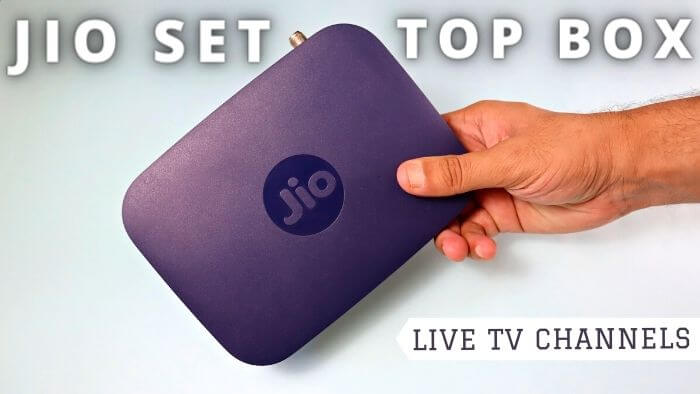
💡 Quick Summary: You can convert an underutilized or spare Jio Set-Top Box (JMSC200A / Amlogic S905X3) into a silent, self-healing 4K Home NAS and 24/7 Emby Media Server using the open-source bhatyassir/jio-stb-nas-server architecture. Operating entirely in non-root user space via Termux and a lightweight Android companion service, this setup delivers high-speed SMB3 file sharing, a universal web management interface, and zero-touch hardware boot persistence—all while drawing just 3 to 5 watts of power and preserving 100% of your TV viewing capabilities.
Modern consumer electronics are frequently retired long before their silicon reaches obsolescence. Millions of households across India subscribed to JioFiber or JioAirFiber have spare or secondary Android TV set-top boxes (STBs) sitting unused in drawers. Most people assume building a private home cloud requires investing in expensive dedicated NAS enclosures from Synology or QNAP ($300 to $600+), or repurposing a bulky desktop PC. While old PCs work, keeping a 65W–100W desktop running 24 hours a day, 7 days a week consumes significant electricity, produces fan noise, and generates excess heat.

The hardware inside carrier-grade Android TV boxes like the Jio JMSC200A is remarkably capable for home server workloads. Powered by an Amlogic S905X3 quad-core ARM Cortex-A55 processor, 2 GB of LPDDR4 RAM, a dedicated USB 3.0 port, and a dual-band 802.11ac Wi-Fi controller, this compact box consumes merely 3 to 5 watts under load—costing approximately ₹300 ($3.60) in electricity for an entire year of uninterrupted 24/7 service.
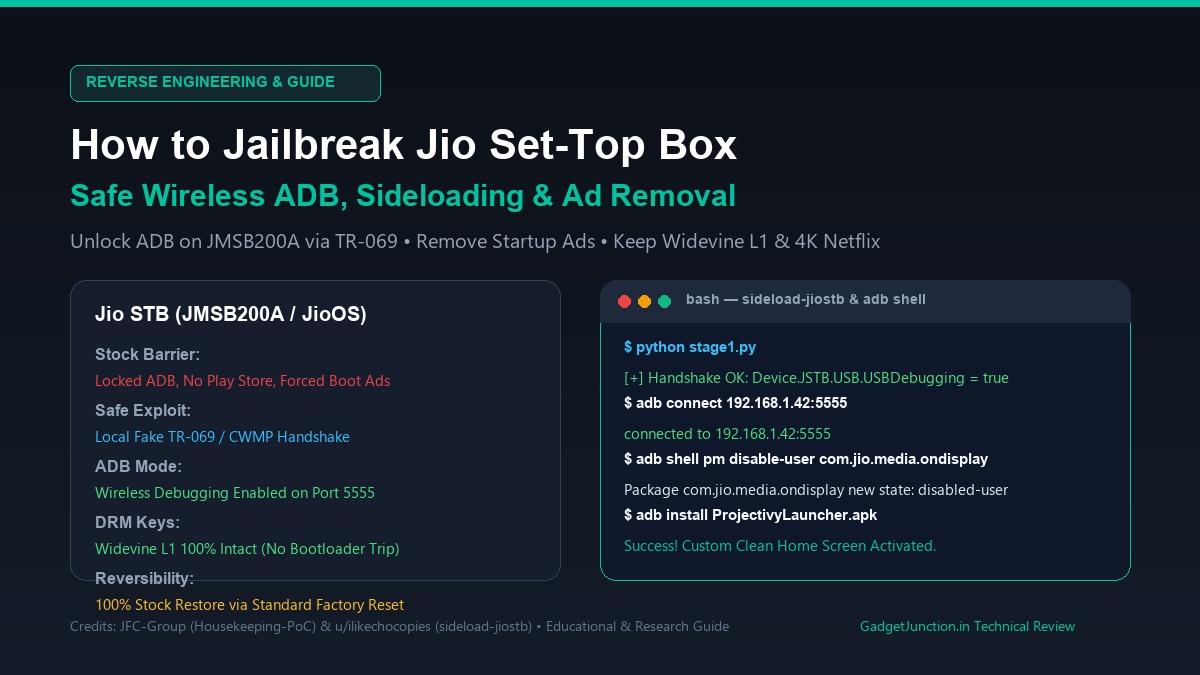
Rather than letting this hardware become electronic waste, open-source developer Bhat Yassir released the jio-stb-nas-server project. Crucially, this is not a destructive hack or bootloader exploit. You do not need to root the operating system, replace carrier bootloaders, or trip cryptographic security fuses (which would destroy Widevine L1 DRM keys needed for 4K streaming services like Netflix, Hotstar, and Prime Video). Everything executes safely within Android’s native Linux user space using standard POSIX utilities, background daemons, and system intents.
Power Consumption & Cost Analysis: STB vs. Traditional Home Servers
Before examining the software architecture, it is helpful to look at the energy economics of running a home file server around the clock:
| Platform | Idle Power | Full Load | Estimated Annual Electricity Cost* |
|---|---|---|---|
| Repurposed Jio STB (S905X3) | 2.5W – 3.2W | 4.5W – 5.5W | ~₹300 ($3.60) |
| Raspberry Pi 4 / 5 | 3.0W – 4.0W | 6.0W – 12.0W | ~₹450 ($5.40) |
| Commercial 2-Bay NAS (Synology/QNAP) | 12W – 18W | 25W – 35W | ~₹1,800 ($21.60) |
| Repurposed Desktop PC / Old Laptop | 45W – 65W | 90W – 150W | ~₹6,500 ($78.00) |
*Calculated based on standard residential electricity tariffs (~₹7.50 / $0.09 per kWh) operating 24 hours a day, 365 days a year.
While an old desktop computer or tower server costs over ₹6,500 annually just to stay plugged in, the Jio STB draws so little power that it costs virtually nothing on your utility bill, runs silently without whirring fans, and fits neatly beside your television or router.
Architectural Deep Dive: How the Server Stack Operates
Transforming an Android TV operating system into an always-on NAS requires overcoming several architectural hurdles inherent to Android’s memory management and storage frameworks.

The project solves three fundamental engineering challenges:
- Dynamic USB Auto-Mounting: Android does not assign static drive letters like
D:or static UNIX mount points like/mnt/usb. Instead, the Android Volume Daemon (vold) dynamically mounts external drives to unique hexadecimal UUID paths under/storage/(for example,/storage/01DBB788C951D420/). The project’s background watchdog script (usb_nas_watchdog.sh) scans/storage/*every 10 seconds, links active volumes under/sdcard/NAS_Root/External_Drives, prunes broken symlinks when drives are disconnected, and provisions the requiredAndroid/data/com.termux/filesfolder for full write permissions. - Low Memory Killer (LMK) Watchdog: Android’s kernel aggressively terminates background processes when system RAM is tight. The watchdog daemon continuously inspects the process table using
pgrep smbdandpgrep filebrowser. If either service is terminated, the supervisor immediately respawns it in detached background mode without requiring user intervention. - Zero-Touch Boot Persistence (
JioNasAutoBoot): To ensure services survive device reboots without an interactive terminal, the repository includes a native Android companion application (com.stb.nas.autostart). It intercepts theBOOT_COMPLETEDsystem broadcast, dispatches a headless command to Termux’sRunCommandService, acquires a persistent CPU wake-lock, and then smoothly triggersIntent.CATEGORY_HOMEafter 4 seconds. The TV powers on normally without any command lines or terminal windows visible to viewers.
The Network Speed Paradox: Why 5 GHz Wi-Fi Outperforms Physical Ethernet
One of the most counterintuitive engineering findings in this project involves network throughput. In traditional desktop networking, connecting an Ethernet cable almost always delivers faster speeds than Wi-Fi. On low-cost and carrier-grade Android TV boxes, the exact opposite is true.
| Network Interface | Hardware Controller | Theoretical Link | Real-World NAS Transfer Rate |
|---|---|---|---|
| Built-in RJ45 Ethernet | 100BASE-TX Fast Ethernet PHY | 100 Mbps | ~11.2 – 11.5 MB/s (Bottleneck) |
| Built-in 5 GHz Wi-Fi | Realtek RTL8822CS 2×2 AC | 866 Mbps | ~40.0 – 55.0 MB/s (Recommended) |
| USB 3.0 Gigabit Adapter | RTL8153 / AX88179 Chipset | 1000 Mbps | ~90.0 – 110.0 MB/s (Maximum) |
Here is why this occurs:
- The Fast Ethernet Bottleneck: To minimize manufacturing costs, the internal RJ45 Ethernet port on the Jio STB is wired to a 100 Mbps Fast Ethernet PHY. This physical limitation caps network transfers to approximately 11.5 MB/s.
- The Wi-Fi 5 Advantage: The integrated wireless module is a dual-band Realtek RTL8822CS (2×2 MIMO 802.11ac) capable of link speeds up to 866 Mbps. Connected to a 5 GHz router, Samba transfers deliver 40 to 55 MB/s—nearly 5 times faster than physical Ethernet.
- Gigabit USB Alternative: For users who prefer wired connections, plugging an inexpensive USB 3.0 to Gigabit Ethernet adapter into the STB’s blue USB 3.0 port achieves full Gigabit speeds (90–110 MB/s), as Android 9–11 has built-in kernel drivers for standard Realtek RTL8153 and ASIX adapters.
💡 Practical Recommendation: For rapid file copies and seamless 4K video playback, connect the STB to your home router over 5 GHz Wi-Fi, or use a USB 3.0 Gigabit Ethernet adapter. Avoid the built-in 100 Mbps RJ45 port for file serving.
Prerequisites & Hardware Preparation
Before beginning the installation, ensure you have the required components ready:
- Jio Set-Top Box: Model JMSC200A (running Android 9 or Android 11 / JioOS).
- External Storage Drive: An external USB 3.0 Hard Drive (HDD) or Solid State Drive (SSD) formatted in exFAT or ext4.
- Powered USB Hub (Essential for Mechanical HDDs): If you use a spinning 2.5-inch or 3.5-inch hard drive, connect it via an externally powered USB 3.0 hub. The STB’s USB port cannot provide the 1.0A–1.5A peak current needed during magnetic drive spin-up, leading to brownouts and filesystem dismounts.
- Android Debug Bridge (ADB): Installed on your PC or Mac via official Android Platform Tools.
- Termux APK: 32-bit ARM (
armeabi-v7a) build v0.118+ downloaded from F-Droid or GitHub.
Step-by-Step Installation Walkthrough
Follow these steps to deploy the NAS server cleanly on your device:
Step 1: Connect via Wireless ADB
Find the local IP address of your set-top box on your television by navigating to: Settings → Network & Internet → Connected Wi-Fi Network (e.g., 192.168.1.150).
From your computer’s terminal, connect via Wireless ADB on port 5555:
adb connect 192.168.1.150:5555
adb devices
adb shell getprop ro.product.cpu.abi
# Confirms architecture: armeabi-v7a
Step 2: Sideload Termux & Grant System Privileges
Install the Termux ARMv7 application package and escalate the necessary filesystem and power management permissions:
# Install Termux APK
adb install -r termux-app_v0.118.1+github-debug_armeabi-v7a.apk

# Grant broad storage access
adb shell appops set com.termux MANAGE_EXTERNAL_STORAGE allow
adb shell pm grant com.termux android.permission.READ_EXTERNAL_STORAGE
adb shell pm grant com.termux android.permission.WRITE_EXTERNAL_STORAGE

# Whitelist Termux from Android Doze / Battery Optimization
adb shell cmd deviceidle whitelist +com.termux

# Launch Termux once to create internal directories
adb shell monkey -p com.termux 1

# Enable external app execution
adb shell "mkdir -p /data/data/com.termux/files/home/.termux"
adb shell "echo 'allow-external-apps = true' >> /data/data/com.termux/files/home/.termux/termux.properties"
Step 3: Deploy the NAS Stack
Access the Termux shell environment directly through ADB and run the automated provisioning script:
adb shell /data/data/com.termux/files/usr/bin/bash

# Inside Termux:
pkg update -y && pkg install -y curl
curl -sL https://raw.githubusercontent.com/bhatyassir/jio-stb-nas-server/main/setup_usb_nas.sh -o setup_usb_nas.sh
chmod +x setup_usb_nas.sh
./setup_usb_nas.sh
The provisioning script automatically strips out unused desktop components, installs Samba SMB3, FileBrowser, and OpenSSH, creates unified root mount points under /sdcard/NAS_Root/, and establishes the dynamic drive watchdog.
Step 4: Non-Root Samba Configuration (Port 4445)
Because Android runs in standard user space without root access, it cannot bind to privileged networking ports below 1024 (standard SMB runs on port 445). To resolve this, Samba is configured to listen on port 4445 with socket optimizations enabled:
[global]
workgroup = WORKGROUP
server string = Jio STB USB NAS
security = user
map to guest = Bad User
smb ports = 4445
max protocol = SMB3
min protocol = SMB2
socket options = TCP_NODELAY SO_RCVBUF=524288 SO_SNDBUF=524288
read raw = yes
write raw = yes
follow symlinks = yes
wide links = yes
unix extensions = no

[External_USB]
path = /storage
writable = yes
browseable = yes
guest ok = yes

[Jio_NAS]
path = /sdcard/NAS_Root
writable = yes
browseable = yes
guest ok = yes
⚠️ Important Security Step: The initial script sets a default administrative password of 123456. You should change this immediately inside Termux by running: smbpasswd -a admin.
Step 5: Install Hardware Boot Persistence (JioNasAutoBoot)
To ensure all server daemons launch automatically when the STB powers on, install the companion auto-boot application:
adb install -r JioNasAutoBoot.apk
adb shell pm grant com.stb.nas.autostart android.permission.RECEIVE_BOOT_COMPLETED
adb shell pm grant com.stb.nas.autostart android.permission.WAKE_LOCK
adb shell cmd deviceidle whitelist +com.stb.nas.autostart
adb shell monkey -p com.stb.nas.autostart 1
Once registered, the companion service intercepts BOOT_COMPLETED, spins up all NAS services in the background, acquires a persistent wake-lock, and redirects the screen back to the TV launcher in 4 seconds.
Client Configuration: Connecting Your Devices
Once active, you can access your storage from any device on your local network:
Windows PC Client (Automated Drive Z:\ Mapping)
Windows natively expects SMB shares on port 445. The standard “Map Network Drive” graphical wizard rejects custom ports, and traditional persistent mappings (/PERSISTENT:YES) cause errors if Windows boots before the network is initialized. The repository includes a robust PowerShell solution in the windows/ directory:
- Copy
windows/nas_mount.ps1andwindows/nas_config.example.ps1to a local folder likeC:\NAS(not in OneDrive). - Rename
nas_config.example.ps1tonas_config.ps1and enter your STB’s IP, MAC address, and credentials. - Run
install_task.ps1as Administrator to register a hidden Windows Scheduled Task that re-checks drive health every 2 minutes.
This script eliminates Error 1219, recovers automatically from DHCP IP changes using ARP table lookups, and automatically upgrades drive Z: from internal fallback storage to external USB as soon as the drive is plugged in.
macOS & Linux Clients
On Apple macOS and Linux machines, custom SMB ports are supported natively:
- Open Finder on macOS and press Command + K.
- Enter:
smb://192.168.1.150:4445/External_USB - Click Connect and log in with your credentials.
Universal Web Interface (FileBrowser on Port 8080)
Open any web browser on your smartphone, tablet, or laptop and navigate to: http://192.168.1.150:8080. Log in with admin / 123456 (and change the password immediately under Settings). This responsive interface enables drag-and-drop file transfers, mobile photo backups, video playback, and shareable download links without needing any client software installed.
24/7 4K Media Streaming (Emby Server on Port 8096)
For smart TVs, Apple TVs, or tablets, sideload the official ARMv7 APK for Emby Server via ADB:
adb install -r embyserver-android-armv7.apk
adb shell appops set com.emby.embyserver MANAGE_EXTERNAL_STORAGE allow
adb shell cmd deviceidle whitelist +com.emby.embyserver
Open http://192.168.1.150:8096 to configure your media library pointing to /storage/. The Amlogic S905X3 processor handles 4K HEVC/H.265 Direct Play effortlessly across your home network.
Storage Best Practices: Avoiding the UNMOUNTABLE Trap
If you connect an NTFS drive to the STB and Android reports the volume as UNMOUNTABLE (or vold: blkid failed to identify), the culprit is almost always the NTFS dirty bit flag created by Windows Fast Startup.
When Windows shuts down with Fast Startup enabled, it puts external filesystems into a hibernated state. Android’s Linux kernel refuses to mount hibernated NTFS volumes to protect against data loss.
- Connect the drive to a PC, open Command Prompt as Administrator, and run:
chkdsk E: /f /r(replaceE:with your drive letter). - Disable Fast Startup in Windows: Control Panel → Power Options → Choose what the power buttons do → Uncheck “Turn on fast startup”.
- For long-term stability, format your drive with exFAT (for cross-platform flexibility) or ext4 (for optimal Linux performance and native journaling).
Security Hardening Checklist
- Change All Passwords: Update Samba (
smbpasswd -a admin), FileBrowser (Settings → Profile), and OpenSSH (passwd). - Disable Guest Shares: If sharing your Wi-Fi network, set
guest ok = noin$PREFIX/etc/samba/smb.conf. - Assign a Static IP: Reserve the STB’s MAC address in your router’s DHCP settings to prevent address changes.
- Use a Powered USB Hub: Protect your drive from power brownouts during heavy I/O operations.
Frequently Asked Questions (FAQ)
Does this affect normal TV viewing?
No. All NAS services run in the background with modest CPU priority. When the box boots, the companion service returns to the Android TV launcher in 4 seconds. Normal video streaming (YouTube, Hotstar, Netflix, etc.) remains fully functional and smooth.
Does this setup require rooting the device or unlocking the bootloader?
No. The entire system operates in non-root user space via Termux and standard Android storage APIs. The bootloader remains untouched, factory partitions are unmodified, and Widevine L1 cryptographic keys are preserved.
Can this setup stream high-bitrate 4K Remux files?
Yes. High-bitrate 4K UHD remuxes typically require bitrates between 60 Mbps and 90 Mbps (~7.5 to 11.2 MB/s). Because the STB connected over 5 GHz Wi-Fi provides 40–55 MB/s of sustained throughput, it streams uncompressed 4K media without stuttering.
What happens if the power goes out?
Because the companion app listens for system boot broadcasts, the entire server stack—including the watchdog, Samba, FileBrowser, and Emby—starts automatically within 10 to 15 seconds after power is restored, without needing a keyboard, mouse, or TV remote.
Conclusion
Repurposing consumer hardware like the Jio Set-Top Box demonstrates how modern software engineering can breathe new life into idle electronics. By combining Termux’s POSIX userland, Samba’s SMB3 implementation, dynamic filesystem watchdogs, and native Android boot receivers, the bhatyassir/jio-stb-nas-server project provides an ultra-low-power, whisper-quiet alternative to power-hungry home servers.